

The British love a good DIY project—and for good reason. Creating something beautiful with your own hands is enormously satisfying, costs significantly less than hiring professionals, and gives you complete creative control. The beauty? Most home decoration projects don’t require specialist skills, fancy tools, or previous experience.
This guide shares 15 genuinely easy DIY decoration projects that transform your home. Every single one is achievable by someone with no experience, basic tools, and an afternoon or two.
1. Paint an Accent Wall
This is genuinely the easiest home decoration project, yet the impact is enormous. Choose one wall, pick a colour you love, and paint it.
What you need:
-
Paint (Dulux, Farrow & Ball, or Little Greene)
-
Primer (essential for good coverage)
-
Roller and brushes
-
Protective dust sheets
-
Painter’s tape
-
Paint tray
The process:
-
Clear the room and protect furniture with dust sheets
-
Prime the wall (usually one coat for lighter paints)
-
Paint two thin coats of your chosen colour
-
Allow each coat to dry fully before adding the next
-
Remove painter’s tape before the paint fully dries
Pro tip: Buy a test pot first. Live with the colour for a few days to ensure you love it in different lights.
Impact: Very high. Cost: £30–80. Time: 3–4 hours.
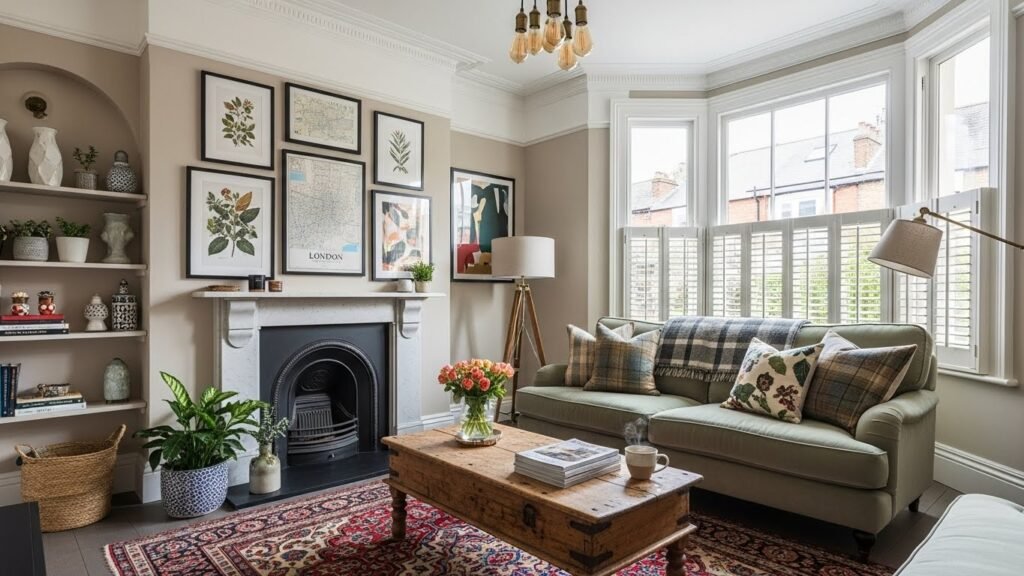
2. Create a Gallery Wall
Gallery walls add personality and visual interest instantly. The beauty? You’re not committed to permanence—use command strips rather than nails.
What you need:
-
Artwork, prints, or photographs
-
Frames in complementary colours (mix sizes)
-
Command strips (no-damage adhesive)
-
A pencil and a spirit level
The process:
-
Decide on your layout: symmetrical grid or salon-style arrangement?
-
Lay everything on the floor first to visualise the arrangement
-
Create a cardboard template for placement
-
Use a level to ensure everything is straight
-
Apply command strips to frames (not the wall) and hang
Pro tip: Mix frame colours, sizes, and artwork styles for visual interest. Black frames look sophisticated. Mix printed art with photographs for personality.
Impact: High. Cost: £30–100 (depending on artwork and frames). Time: 2–3 hours.
3. Refresh Furniture with Chalk Paint
Tired furniture becomes a treasure when refreshed with chalk paint. This thick, matte paint adheres beautifully to wood, metal, and old finishes without intensive preparation.
What you need:
-
Chalk paint (Rust-Oleum, DIY stores stock it)
-
Paintbrushes or rollers
-
Optional: wax or polyurethane for durability
-
Sandpaper (fine grit, 150–220)
The process:
-
Clean the furniture thoroughly
-
Light sand the existing finish (helps paint adhere)
-
Apply two coats of chalk paint
-
Optional: seal with wax or a protective coating for durability
Pro tip: Chalk paint comes in beautiful colours. Soft sage, navy, charcoal, and warm whites are particularly lovely on British furniture.
Impact: Transformative. Cost: £10–30. Time: 1–2 hours plus drying time.
4. Stencil Wall Patterns or Designs
Stencilling allows you to add patterns to walls without the commitment of wallpaper. Stencil kits are inexpensive and incredibly beginner-friendly.
What you need:
-
Stencil kit (geometric patterns, florals, mandalas available)
-
Stencil paint (water-based, quick-drying)
-
Sponges or rollers
-
Painter’s tape
-
Optional: spray adhesive to hold stencil in place
The process:
-
Plan your design and mark placement lightly with a pencil
-
Secure stencil with painter’s tape or spray adhesive
-
Apply paint with a sponge or roller, working from the edges inward
-
Let the paint dry fully before removing the stencil
-
Re-position stencil and repeat
Pro tip: Start with small projects (perhaps one feature wall or a corner) before committing to an entire room.
Impact: High. Cost: £15–40. Time: 2–4 hours, depending on complexity.
5. DIY Floating Shelves
Floating shelves provide storage and display space without consuming floor area. Installation is straightforward with a drill and wall anchors.
What you need:
-
Wooden shelves or boards
-
Floating shelf brackets (available at B&Q, Dunelm, IKEA)
-
Drill with bits
-
Stud finder (optional but helpful)
-
Level
The process:
-
Decide shelf height and location
-
Mark wall studs if possible (stronger support)
-
Drill holes for shelf brackets, using wall anchors if no studs
-
Install brackets securely
-
Place shelves on brackets and secure (per bracket instructions)
Pro tip: Paint shelves to match your wall colour for seamlessness, or choose contrasting wood finishes for visual interest.
Impact: Moderate to high. Cost: £20–60 depending on shelf size. Time: 1–2 hours.
6. Make Your Own Canvas Art
Store-bought canvas art is expensive. Creating your own is surprisingly simple and far more personal.
What you need:
-
Blank canvas
-
Acrylic paint or printable canvas paper
-
Brushes (for painting) or a printer (for printing)
-
Optional: embellishments like gold leaf, glitter, or collage elements
The process:
Option 1 – Painting:
-
Sketch your design lightly in pencil
-
Paint with acrylic paint
-
Allow to dry fully
Option 2 – Printing:
-
Design your artwork digitally (Canva works brilliantly)
-
Print onto canvas paper
-
Mount on a wooden stretcher frame for a finished look
Pro tip: Abstract art is forgiving if you’re not confident with figurative art. Or create typography-based pieces with meaningful quotes.
Impact: Moderate. Cost: £5–20 per piece. Time: 30 minutes to 2 hours.
7. Macramé Wall Hangings
Macramé is experiencing a major comeback, and it’s completely achievable for beginners. Kit-based projects make it foolproof.
What you need:
-
Macramé kit (includes rope and instructions)
-
Wooden dowel or branch for hanging
-
Scissors
-
Optional: beads or shells for embellishment
The process:
-
Follow your kit’s instructions precisely
-
Work through knots systematically
-
Attach to your wooden dowel or branch
-
Hang on the wall with appropriate hooks
Pro tip: Start with a small wall hanging before attempting large projects.
Impact: Moderate to high. Cost: £5–20. Time: 2–4 hours.
8. Create a Feature Wall with Peel-and-Stick Wallpaper
Peel-and-stick wallpaper is perfect for renters or anyone wanting a temporary change. Application is straightforward, and removal leaves no damage.
What you need:
-
Peel-and-stick wallpaper (available at Dunelm, Etsy, Amazon)
-
Utility knife
-
Smoothing tool or credit card
-
Level
The process:
-
Clean the wall thoroughly
-
Peel the backing and carefully align the first strip
-
Smooth from the centre outward to remove air bubbles
-
Trim excess at edges with a utility knife
-
Repeat with subsequent strips, matching patterns
Pro tip: Peel-and-stick works best on smooth walls. Textured walls are more challenging.
Impact: Very high. Cost: £15–50. Time: 2–3 hours.
9. Decoupage Furniture or Accessories
Decoupage (applying cut-out images to objects with glue) is therapeutic, creative, and transforms plain furniture into artistic pieces.
What you need:
-
Decorative paper, magazine images, or scrapbooking paper
-
Mod Podge or PVA glue
-
Scissors
-
Paintbrush or foam brush
-
Optional: polyurethane for sealing
The process:
-
Clean and prepare your object
-
Cut out your chosen images or patterns
-
Apply glue to the back of each piece
-
Press onto your object, smoothing to remove bubbles
-
Seal with polyurethane for durability
Pro tip: Works beautifully on wooden boxes, terracotta pots, mirror frames, and old furniture.
Impact: Moderate. Cost: £5–20. Time: 1–3 hours.
10. Paint Terracotta Pots
Plain terracotta pots become design features when painted. This is perhaps the easiest project possible.
What you need:
-
Terracotta pots
-
Acrylic paint
-
Paintbrushes
-
Optional: sealant for outdoor pots
The process:
-
Clean pots and let them dry
-
Paint with acrylic paint (two coats if needed)
-
Allow to dry fully
-
Optional: seal for outdoor use
Pro tip: Geometric patterns, stripes, or solid colours all work beautifully. Use stencils for precision.
Impact: Moderate. Cost: £0–10. Time: 30 minutes.
11. Create Fabric Wall Art
Transform fabric scraps, vintage textiles, or beautiful fabric into wall art mounted on stretcher frames.
What you need:
-
Beautiful fabric
-
Wooden stretcher frames (art supply stores or online)
-
Staple gun or hot glue gun
-
Scissors
The process:
-
Cut the fabric slightly larger than your stretcher frame
-
Place fabric on the frame, pulling taut
-
Staple or glue on the back, ensuring the fabric is smooth and tight
-
Trim excess fabric
-
Hang it on the wall
Pro tip: Vintage fabric, beautiful linens, or even wallpaper samples work beautifully.
Impact: Moderate. Cost: £5–20. Time: 30 minutes.
12. DIY Mirror Frames
Plain mirrors become design statements when given interesting frames. Fabric, wallpaper, or wood frame strips transform basic mirrors.
What you need:
-
Plain mirror
-
Framing materials (fabric, wallpaper, wooden strips)
-
Hot glue gun or strong adhesive
-
Optional: paint or stain
The process:
-
Decide on your frame material
-
Measure and cut pieces to size
-
Apply to mirror edges with strong adhesive
-
Allow to dry fully before hanging
Pro tip: Rattan, woven materials, and colourful fabrics create interesting textures around mirrors.
Impact: Moderate. Cost: £5–20. Time: 30 minutes to 1 hour.
13. Make Your Own Planters from Household Items
Before buying expensive plant pots, repurpose household items. Old tin cans, ceramic bowls, wooden boxes—all become beautiful planters with a bit of creativity.
What you need:
-
Household items (tin cans, bowls, boxes)
-
Paint or decorative materials (optional)
-
Drainage holes (drill or punch)
-
Plants
The process:
-
Clean items thoroughly
-
Paint if desired (or leave as-is for an industrial aesthetic)
-
Create drainage holes if using solid containers
-
Add soil and plants
Pro tip: Grouped, varied planters in similar colours create a designed look.
Impact: Moderate. Cost: £0–5. Time: 30 minutes.
14. Create String Art
String art combines geometric shapes, colour, and texture into modern wall art. It’s meditative to create and strikingly beautiful when finished.
What you need:
-
Wooden board or plywood
-
Nails
-
Colourful string or yarn
-
Pencil for design
The process:
-
Sketch your design on the board
-
Hammer nails around your design outline
-
Tie a string to a nail and weave around the others, creating patterns
-
Mount on the wall
Pro tip: Simple geometric designs are most effective. Triangles, mandalas, and abstract patterns all work.
Impact: Moderate. Cost: £5–15. Time: 2–4 hours.
15. DIY Dreamcatchers
Dreamcatchers add bohemian elegance and are genuinely simple to create.
What you need:
-
Wooden hoops or wire bent into circles
-
String or yarn
-
Feathers, beads, or tassels
-
Hot glue gun
The process:
-
Create a web inside the hoop by stringing back and forth
-
Attach decorative elements with glue
-
Add hanging loop
-
Mount on the wall or above the bed
Pro tip: Mix with multiple sizes and colours for a bohemian wall display.
Impact: Moderate. Cost: £5–15. Time: 1–2 hours.
Your DIY Project Timeline
You don’t need to do all 15 projects. Start with what excites you most:
Easy starts: Painted accent wall, gallery wall, canvas art
Moderate projects: Floating shelves, peel-and-stick wallpaper, chair painting
Creative projects: Macramé, string art, decoupage
Pick one or two this month. You’ll be amazed at how much one DIY project transforms a room. The confidence you gain from completing one makes the next project even easier.
Conclusion
Home decoration doesn’t require professional skills or enormous budgets. These 15 DIY projects prove that. With basic tools, affordable materials, and a willingness to try, you can completely transform your UK home. Start somewhere, create something, and discover the genuine satisfaction of a home you’ve beautified yourself. That personal touch? It’s worth far more than any professionally decorated space.